 Save to Pinterest
 A few summers ago, my sister texted me the morning of July Fourth asking if I could bring something patriotic to our family picnic. I was standing in my kitchen with zero inspiration until I noticed a carton of cream cheese on the counter and thought, why not skip the oven entirely? Within an hour, I had layers of creamy cheesecake and fresh berries arranged into a flag that looked almost too pretty to eat. It became the unexpected star of the day, and now it's the dessert everyone asks for every Independence Day.
I'll never forget my nephew's face when he realized the berries weren't just decoration but part of the actual design. He spent five minutes photographing it before eating a huge slice, and that silly moment reminded me that food is really about creating memories together, not about perfection.
Ingredients
- Graham cracker crumbs: The foundation that holds everything together, and using fresh crackers instead of stale ones makes a noticeable difference in texture.
- Unsalted butter: Essential for bringing the crust together without adding excess salt that would overpower the delicate filling.
- Granulated sugar: A small amount adds just enough sweetness to balance the salty graham crackers.
- Cream cheese: Must be softened to room temperature so it blends smoothly without lumps that can ruin the silky texture.
- Heavy whipping cream: Keep this cold and whip it to stiff peaks separately for maximum fluffiness and structure.
- Powdered sugar: Dissolves more easily than granulated sugar and keeps the filling smooth and cloud-like.
- Vanilla extract: A teaspoon adds depth without being obvious, just letting the creamy richness shine through.
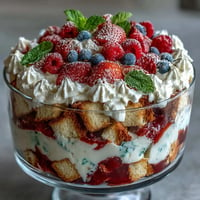
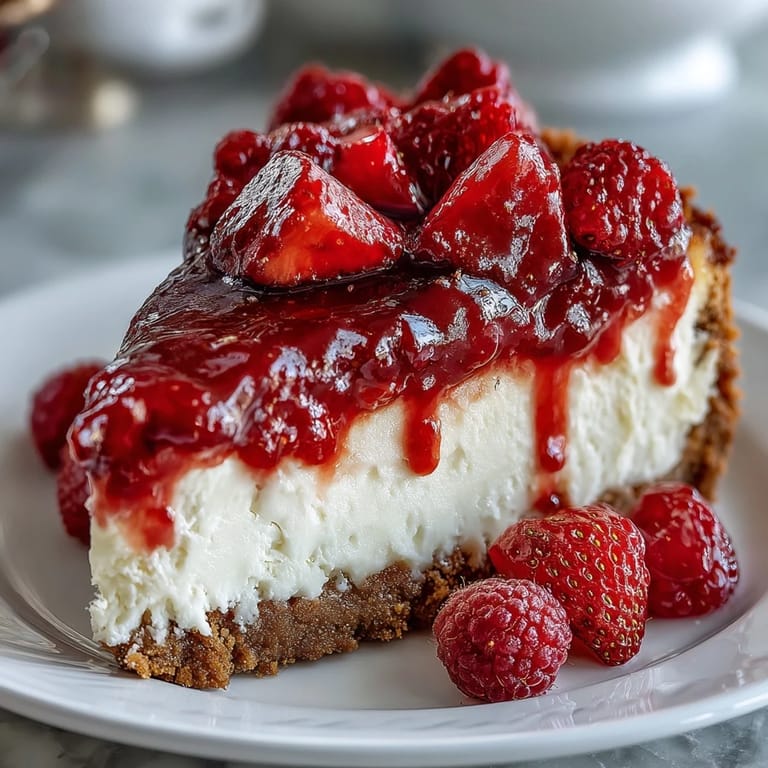
- Fresh blueberries: These are your stars in the upper left corner, and their tartness cuts through the richness beautifully.
- Fresh strawberries: Sliced thin and arranged in rows, they create the iconic red stripes and should be as ripe as possible for flavor.
- Fresh raspberries: Optional but worth it if you want to deepen the red stripes and add a delicate tartness.
Tired of Takeout? 🥡
Get 10 meals you can make faster than delivery arrives. Seriously.
One email. No spam. Unsubscribe anytime.
Instructions
- Build your foundation:
- Toss the graham cracker crumbs with melted butter, sugar, and salt until it looks like wet sand. Press it firmly and evenly into your baking dish, using the flat bottom of a measuring cup to make sure there are no gaps.
- Soften and blend:
- Beat the cream cheese until it's completely smooth and free of lumps, then add powdered sugar and vanilla, mixing until everything disappears into the filling. This is where patience matters because lumpy filling spreads unevenly.
- Create the cloud:
- Whip the heavy cream in a separate chilled bowl until stiff peaks form, then gently fold it into the cream cheese mixture with a spatula using wide, sweeping motions to keep all that air intact. Don't overmix or you'll deflate the whole thing.
- Spread and smooth:
- Pour the filling over the crust and use a spatula to create an even, smooth top, taking your time to eliminate any bumps or ridges. This is where an offset spatula makes life easier, but a regular one works just fine.
- Paint your flag:
- Arrange blueberries in the upper left corner first, then create alternating rows of strawberry slices and plain filling across the rest of the cake. Step back and look at it from different angles to make sure the design reads clearly.
- Chill and set:
- Cover loosely and refrigerate for at least 4 hours until the filling is completely set and holds its shape when you run a knife through it.
 Save to Pinterest
 There's something magical about serving a dessert that looks like edible art, especially when kids are involved. Watching people pause to admire it before digging in reminds you that we eat with our eyes first.
Timing and Make-Ahead Strategy
The beauty of this recipe is its flexibility with your schedule. You can make the entire cake up to 24 hours ahead and store it covered in the refrigerator, which takes all the stress out of party prep. If you're worried about berries losing their freshness or juice, arrange them no more than 2 hours before serving for the most vibrant presentation.
Berry Variations and Swaps
While blueberries and strawberries are traditional, this flag welcomes creative tweaks based on what looks best at your farmers market. Raspberries create more vivid red stripes, blackberries add drama with deeper color, and even red currants make beautiful delicate accents if you're feeling adventurous. The tartness of any berry works well against the sweetness of the filling, so don't be afraid to mix textures and hues.
Serving and Storage Tips
Slice with a clean, warm knife wiped between cuts to keep the presentation pristine and prevent the filling from dragging. This dessert is best enjoyed straight from the cold refrigerator on a hot day, and leftovers keep beautifully for up to three days when covered well.
- Warm your knife under hot water and dry it completely before each slice for clean, professional-looking portions.
- If you're transporting this to a picnic, keep it in a cooler with ice packs and don't slice it until you're ready to serve.
- Leftover slices become a welcome breakfast treat the next morning if no one's watching.
 Save to Pinterest
 This cake has become my go-to celebration dessert because it proves that impressive doesn't have to mean complicated. There's something perfect about ending a summer day with cool, creamy sweetness and fresh fruit that tastes like the season itself.
Recipe FAQs
- → How do I prevent the crust from becoming soggy?
Press the graham cracker mixture firmly and chill it well before adding the filling. This helps the crust set and resist moisture absorption.
- → Can I substitute the berries with other fruits?
Yes, try blackberries or raspberries for a different color contrast while keeping the fresh, fruity toppings.
- → How long should the cheesecake chill for best results?
Refrigerate for at least 4 hours to allow the filling to set properly and the flavors to combine.
- → Is it possible to make this dessert gluten-free?
Use gluten-free graham crackers in the crust to accommodate gluten-free dietary needs.
- → What is the best way to achieve stiff peaks with the heavy cream?
Chill the cream and mixing bowl before whipping, then beat on medium-high speed until firm peaks form for optimal texture.