 Save to Pinterest
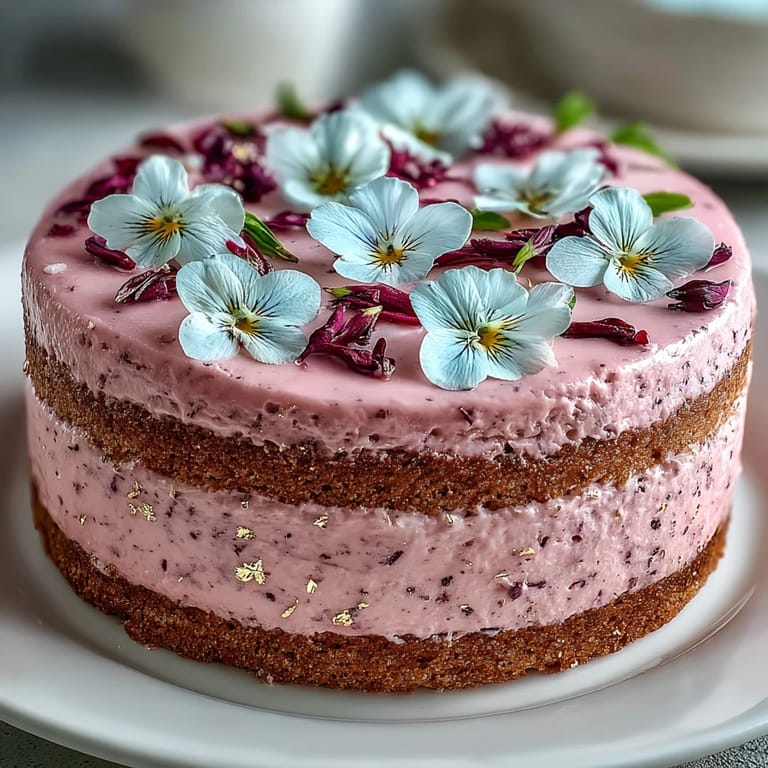
 When my cousin called to say she'd been accepted to her dream graduate program, I knew exactly what I wanted to do. Not just bake her a cake, but create something that felt as momentous as her achievement. I'd watched videos of Swiss meringue buttercream being piped onto elegant cakes, seen photos of gold leaf catching light, and thought: this is it. The first time I made this cake, my kitchen smelled like vanilla and butter for days, and my hands were still glittery from the gold leaf long after the celebration ended. It became clear that this wasn't just dessert—it was edible pride.
I made this cake for my best friend's graduation party on a humid June afternoon, and something magical happened. As I brushed the delicate gold leaf onto the buttercream, my friend walked into the kitchen and went completely quiet. When she finally spoke, she said the cake looked too beautiful to eat—and then she laughed because of course we'd eat it anyway. That moment of her just standing there, taking it all in, made every whisked egg white and carefully placed flower worth it.
Ingredients
- All-purpose flour (2 1/2 cups): The foundation that keeps the cake tender and not dense; make sure it's sifted or whisked into the batter gently.
- Baking powder (2 1/2 tsp): Your lift and rise, so don't skip measuring precisely or your layers won't have that perfect height.
- Unsalted butter (1 cup plus 1 1/2 cups): Room temperature is non-negotiable here; cold butter won't cream properly and will mess with your crumb.
- Granulated sugar (2 cups plus 1 1/4 cups): Creates structure in the cake and sweetness in the buttercream; don't substitute with other sugars without changing the chemistry.
- Eggs (4 large plus 5 egg whites): Room temperature eggs incorporate air and blend smoothly into both cake and buttercream—cold ones resist emulsifying.
- Vanilla extract (1 tbsp plus 2 tsp): The subtle backbone of flavor that ties everything together; use real extract, not imitation.
- Whole milk (1 cup): Keeps the crumb moist without making it heavy; room temperature helps it blend seamlessly.
- Edible gold leaf sheets: Adds that wow factor but must be food-safe and labeled specifically for consumption.
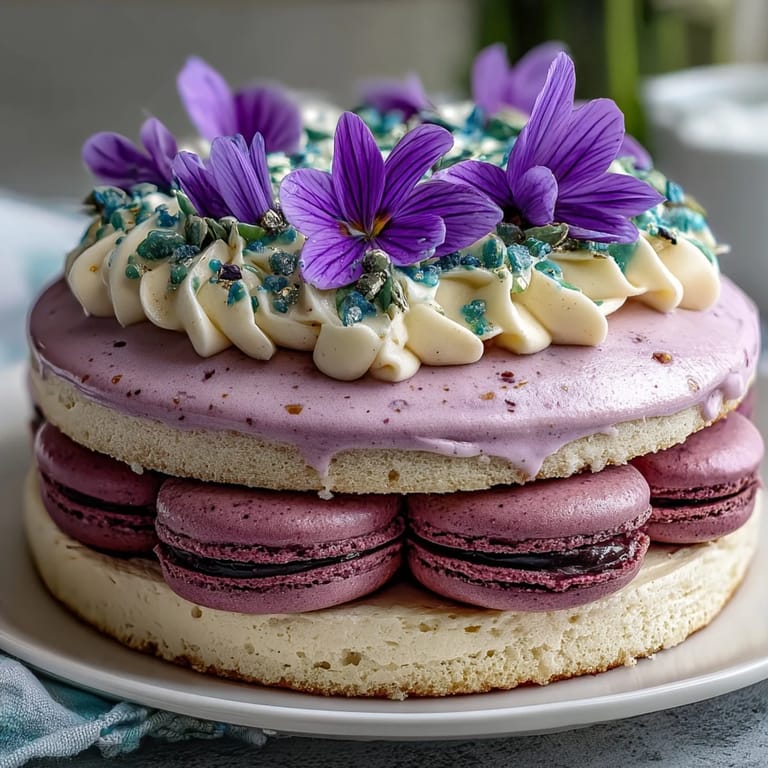
- Assorted edible flowers (pansies, violets, roses): These must come from a trusted source grown without pesticides; farmers markets and specialty cake shops are your safest bet.
- Food-safe paintbrush: Specifically for food use, to gently apply the gold without tearing or shifting it.
Tired of Takeout? 🥡
Get 10 meals you can make faster than delivery arrives. Seriously.
One email. No spam. Unsubscribe anytime.
Instructions
- Set up and preheat:
- Heat your oven to 350°F and grease three 8-inch round pans, lining them with parchment so the cakes slip out cleanly. This small step saves you from frustration later.
- Combine dry ingredients:
- Whisk flour, baking powder, and salt together in a bowl and set aside, so they're ready to go when you need them.
- Cream butter and sugar:
- Beat butter and sugar together for about 3 minutes until it's noticeably lighter in color and fluffy—this creates air pockets that make the cake tender. You'll know it's ready when it looks like fluffy clouds.
- Add eggs one at a time:
- Drop in each egg individually, beating well after each addition so everything emulsifies properly and the batter stays smooth. Rushing this step can cause the mixture to look grainy.
- Mix in vanilla:
- Stir in the vanilla extract just to combine, letting its warmth spread through the batter.
- Alternate flour and milk:
- Start with flour, then milk, then flour again, mixing only until each addition disappears—overworking this develops gluten and makes the cake tough. The batter should fall smoothly from the spoon when ready.
- Fill pans and bake:
- Divide batter evenly among the three pans, smooth the tops, and slide them into the oven for 28 to 32 minutes until a toothpick comes out clean. The kitchen will smell incredible.
- Cool the layers:
- Let cakes rest in their pans for 10 minutes, then turn them out onto wire racks to cool completely; this prevents them from steaming and becoming soggy.
- Make Swiss meringue buttercream:
- Whisk egg whites and sugar over simmering water, stirring constantly until the mixture reaches 160°F—this pasteurizes the eggs and dissolves the sugar completely. It takes about 5 minutes and your arm will feel it, but don't stop.
- Whip into peaks:
- Pour the warm mixture into a stand mixer and beat on high for 8 to 10 minutes until stiff peaks form and the bowl feels cool to the touch. The transformation from liquid to cloud-like frosting is mesmerizing.
- Add butter gradually:
- Reduce the mixer speed to medium and add butter a few cubes at a time, waiting for each addition to incorporate before adding more. If it looks broken or curdled, just keep mixing—it will come together.
- Season and set:
- Add vanilla and salt, then mix until the buttercream is smooth and spreadable, like velvet.
- Layer and crumb coat:
- Place the first cake layer on a serving plate, spread a generous layer of buttercream on top, and repeat with the remaining layers. Apply a thin crumb coat to seal in any loose crumbs, chill for 20 minutes, then apply the final smooth layer of buttercream with an offset spatula.
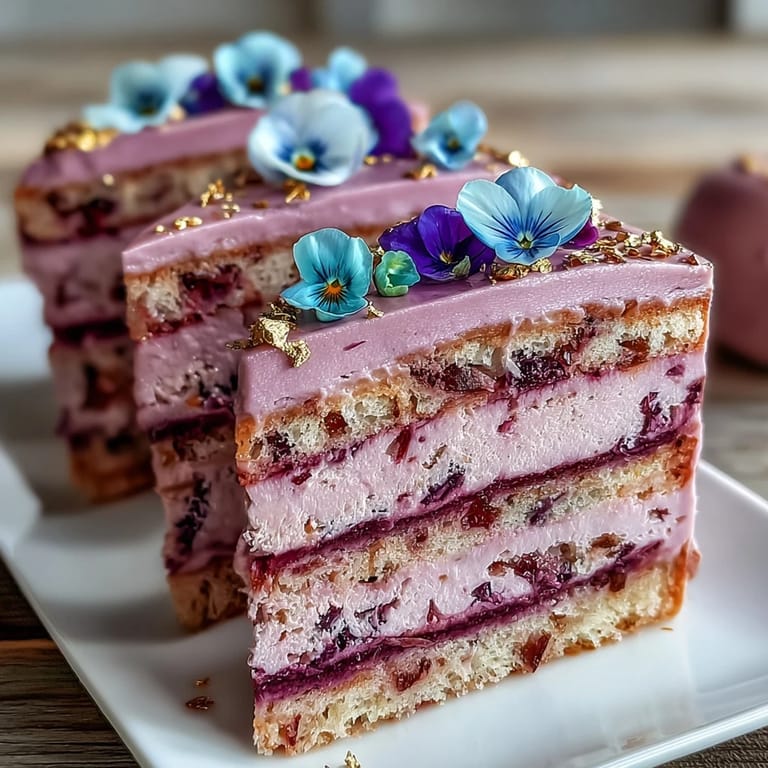
- Apply gold leaf:
- Using your food-safe paintbrush, gently position edible gold leaf onto sections of the cake—it's delicate, so move slowly and let the brush guide it rather than pressing hard. The gold catches light beautifully against the white buttercream.
- Arrange flowers:
- Place your edible flowers decoratively across the cake, creating clusters or a scattered garden effect—whatever feels right to you. Add a gold ribbon around the base if you want extra elegance.
 Save to Pinterest
 The night of my friend's graduation party, someone took a photo of her cutting into the cake, and her face when she saw the layers inside was pure joy. She'd been stressing about her big day for months, and somehow this cake felt like a small way of saying: you made it. That's when I realized baking isn't really about perfection—it's about showing up for the people you love with something you made with your own hands.
Why the Swiss Meringue Buttercream Matters
Regular buttercream made with just butter and powdered sugar is fine, but Swiss meringue buttercream is on another level entirely. It starts by heating egg whites and sugar over hot water, which pasteurizes the eggs and dissolves the sugar completely, creating a foundation that's more stable and silky than anything else. The result is a frosting that pipes beautifully, holds its shape on warm days, and tastes like something you'd order at a fancy bakery. The first time I made it, I was convinced it would break and separate into a greasy mess, but instead it transformed into something luxurious that made the whole cake feel like an occasion.
Sourcing Edible Flowers the Right Way
The difference between regular flowers and edible flowers isn't just a label—it's about safety. Florists treat their flowers with pesticides and preservatives that are absolutely not meant for eating, so buying flowers from the grocery store floral section won't work here. Your best options are farmers markets with vendors who specifically grow edible flowers, specialty cake and baking shops that carry them, or online retailers who focus on culinary flowers. I learned this the hard way when I almost bought beautiful roses from a regular flower shop before my friend gently pointed out they were probably toxic. Since then, I've built relationships with two farmers market vendors who grow gorgeous pansies, violets, and roses specifically for cooking and decorating. The flowers last longer when you source them this way too, since they haven't been chemically treated.
Gold Leaf and the Art of Not Overthinking It
Edible gold leaf intimidated me for years because it seems so delicate and precious that I imagined it would tear and ruin everything. The truth is much simpler: it's incredibly thin, yes, but it's also forgiving and looks stunning even if it's slightly imperfect or crinkled. The key is to use a soft, dry food-safe paintbrush and let the brush do the work rather than pressing with your fingers. You can apply the gold leaf directly to the buttercream, letting it stick naturally, or you can paint a tiny bit of edible glue onto the buttercream first if you want extra security. I always work in a calm, still environment because any air current will send the gold floating away like magic.
- Start by practicing on a small section of the cake so you get a feel for how delicate it is without worrying about ruining the whole thing.
- If a piece tears or doesn't stick perfectly, just layer another piece over it—imperfection adds character and no one will notice.
- Save any leftover gold leaf in a dry, sealed container; it lasts forever and you'll use it again.
 Save to Pinterest
 This cake celebrates achievement in a way that feels both elegant and personal, and it's honestly easier to make than it looks. Serve it with sparkling wine or a light fruit punch, and watch people fall silent for a moment before they smile.
Recipe FAQs
- → What type of cake layers are used?
Moist vanilla sponge layers serve as the base, providing a tender and flavorful texture ideal for layering.
- → How is the buttercream prepared?
The buttercream is a silky Swiss meringue style, made by heating egg whites and sugar before whipping in butter for a smooth finish.
- → How do you apply the gold leaf safely?
Use a food-safe paintbrush to gently place the edible gold leaf onto the chilled cake surface, avoiding tearing or excess handling.
- → Which flowers are suitable for decoration?
Only edible flowers such as pansies, violets, and roses that are pesticide-free and food-safe should be used.
- → Can the cake be customized for other flavors?
A chocolate variation can be made by substituting part of the flour with cocoa powder to add a rich chocolate dimension.
- → What is the best way to store this decorated cake?
Keep the cake refrigerated to maintain the buttercream’s texture and the freshness of the flowers and gold leaf embellishments.